
My iOS Apps
Putta for the iPhone
Lotta! for the iPhone
Lotta! for the iPad
iOS Software
Auto Layout Demo
Motion Effects subclass
Table View Edit Pane
Mac OS Software
Lotto X
ListView
Classic Software
MacTravesty
Lotto
HyperCard Software
SkivBunt
MacTidingsNU » Sork Software » Text In Motion
Updated 14-02-17
Text In Motion
One of the cool new features in iOS 7 is motion effects, a technique that makes it easier to add depth to your apps UI. It is used for the parallax effetcs in the new OS. However, a number of people complaining about nausea from the movements suggests that the effects should be used with caution and perhaps as an option only for those with a tendency to motion sickness.
The new feature is based on UIMotionEffect, an abstract superclass that creates motion-based modifiers for views. This is meant to be suclassed, something made easier by the class UIInterpolatingMotionEffect that should cover most needs. However, Apples documentation for UIMotionEffect shows that special subclasses can be accomplished with a single line of code. This is the base for this article that extends the functionality to content within a view, such as Core Graphics visuals.
As an introduction to the concept of motion effects I can highly recommend an excellent article by Teehan+Lax that offers an fine example of a UIMotionEffect subclass.
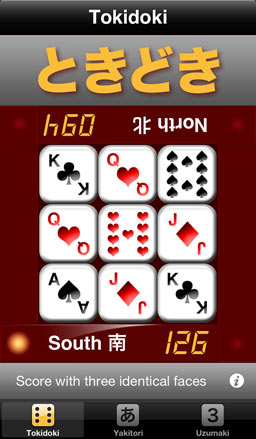 When updating my little app Putta for the 4 inch iPhone I realized that the square format of my game did not really benefit from the longer screen. Because of this I simply used the extra space for a large game title in a Japanese font. The title was created in the wonderful PaintCode app where the kerned and shadowed yellow text was exported as UIBezierPaths to be drawn in the title view’s
 drawRect: method. As was the norm pre-iOS 7, the view also features a gray gradiated background.
The large title is an obvious target for a small motion effect. However, to look realistic, the movement must separate the text and its shadow. I thought a useful effect could be created by moving the text one way and the shadow in the opposite direction.
Just moving the title view would not be enough, the shadow offset must be adjusted at the same time and that is not straight forward. It turned out that I had create a custom subclass to get at the actual offset. To understand why, we have to go deeper into the basics of the motion effects.
Before we delve any further into my custom implementation, it is useful to look at how the basic interpolating motion effect is created and applied. Here is an example for the horisontal motion:
	UIInterpolatingMotionEffect *horizontalMotionEffect = [[UIInterpolatingMotionEffect alloc]
	initWithKeyPath:@"center.x type:UIInterpolatingMotionEffectTypeTiltAlongHorizontalAxis];
	// set the min and max values here
	[theView addMotionEffect:horizontalMotionEffect];
Notice how the motion is applied as an animation to the center.x property that is key-value coding compliant. Other animatable properties can be found in the view, its layer, or in any subviews accessible from the view's properties. This obviously does not include the parameters inside my drawRect: method, such as the shadowOffset used by the CGContextSetShadowWithColor function.
It might be possible to create a useful property, but as I am not KV coding competent, I choose a different way. By using my own UIMotionEffect subclass, I can let this broadcast the relevant offsets with a notification that is used by my controller to adjust the drawing code.
Now for the simple subclass code! The Apple docs shows it like this:
NSDictionary* dict = @{@"center" : [NSValue valueFromCGPoint:CGPointMake(3.4, 1.2)], @"layer.shadowOffset.x : @(-1.1) };
Which is cool but riddled with three errors: valueFromCGPoint: should be valueWithCGPoint:, shadowOffset takes a CGSize so the following property should be a width, not x, and there is a missing closing " after the property.
This rsebbe slideshare presentation offers another example in slide 12:
My subclass with the notification code use the following code. Please note that the parameter viewerOffset is in the range 0 to 1:
- (NSDictionary *)keyPathsAndRelativeValuesForViewerOffset:(UIOffset)viewerOffset {
    // Apply a static factor to the movement offsets
    CGFloat xOffset = 11 * viewerOffset.horizontal;
    CGFloat yOffset = 11 * viewerOffset.vertical;

    // This method returns a value associated with property key paths
    NSValue *offsetPoint = [NSValue valueWithCGPoint:CGPointMake(xOffset, yOffset)];

    // Notify our VC about a move action and its offsets packed into a dictionary as a point value
    NSValue *offsets = [NSValue valueWithCGPoint:CGPointMake(viewerOffset.horizontal, viewerOffset.vertical)];
    NSDictionary *didMove = @{@"Move" : self, @"Offset" : offsets};
    [[NSNotificationCenter defaultCenter] postNotificationName:MoveNotification object:self userInfo:didMove];

    // The view center property key path will be modified with the adjusted offsets
    return @{@"center" : offsetPoint};
}
Then in my VC the notification code updates the title view shadow offset property as a point:
- (void)deviceMoved:(NSNotification *)notification {
    // Get the move from the notification userInfo
    NSValue *theMove = [[notification userInfo] objectForKey:@"Offset"];
    CGPoint thePoint = [theMove CGPointValue];

    // Update the drawing with the new offsets
    self.titleView.offsets = thePoint;

    [self.titleView setNeedsDisplay];
}
The title and its offset will update every time a motion sends a notification. Here is the beginning of the drawing code with some calculations for the shadow offsets:
- (void)drawRect:(CGRect)rect {
	// The offsets come from our view controllers notification deviceMoved:
	// Modify the offsets with the same factor as the view movement
 	CGFloat xAdjustment = 11 * self.offsets.x;
	CGFloat yAdjustment = 11 * self.offsets.y;

	// The basic shadow offset is 3.3
	UIColor* shadow = shadowColor;
	CGSize shadowOffset = CGSizeMake(3.3 - xAdjustment, 3.3 - yAdjustment);
	CGFloat shadowBlurRadius = 6;
I will not show the rest of the long-winded CG code here, you can visit it in the sample project if you wish.
The motion effect is created by moving the whole title view with a transparent background through its center property while changing the shadow offset in the opposite direction.
To complete the illusion the background gradient was moved to a separate view behind the now transparent title view. This is how the drawing looks at close range with the device tilted up, flat and tilted down. It may look as if the background moved too, but that is an optical illusion!


Version list
Version 1.0 first release. Jan 2014.
Downloads
Xcode 5 project for the motion: TextInMotion.zip (61 kB)
E-mail your thoughts on the example to:
Putta is the simple game with a twist (or two).